Nanobodies, also referred to as VHHs or single domain antibodies, are derived from camelids and have become important as therapeutics. One of the first commercially available nanobody therapies, Capazulsimab, prevents blood clumping in patients with acquired thrombotic thrombocytopenic purpura (aTTP).
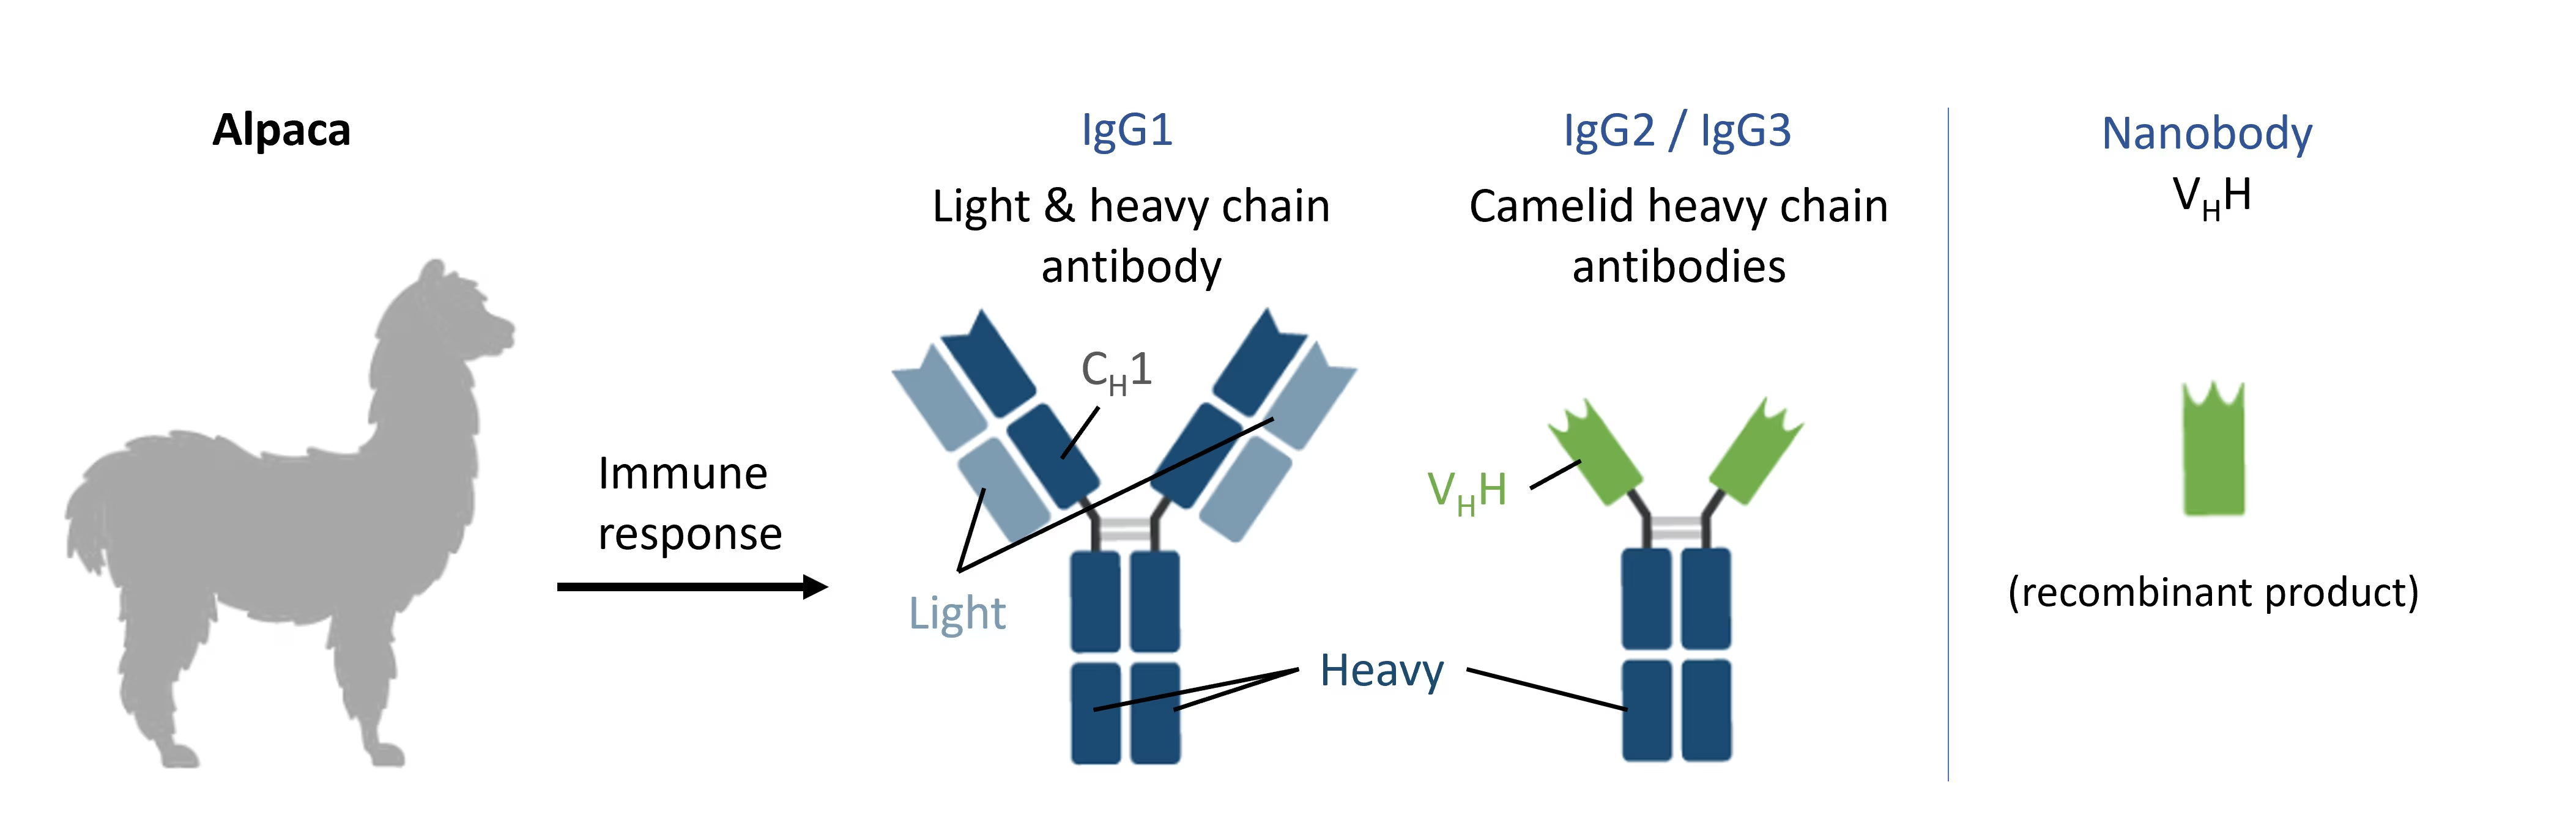
They have quickly become a preferable therapeutic modality due to their favorable developability, high solubility, thermal and chemical stability, ease of engineering and small size to mediate binding in tight cavities. As such, nanobody design is of high relevance to the field. Today, you will be experimenting with BoltzGen to design nanobodies towards the SARS-CoV-2 RBD (8CYJ).
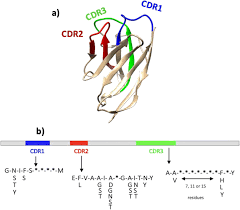
Nanobodies have specific variable regions called Complementarity-Determining-Regions (CDRs) that mediate binding. With BoltzGen we will be designing new CDR regions an keeping the nanobody framework (non-CDR regions; beige in image below) static.
8CYJ Binding Affinities (PRODIGY calculated)
| Chain | Binding Affinity (∆G) | Kd(nM) |
| A | -7.3 | 7000 |
| B | -12.5 | 1.6 |
| C | -9.7 | 150 |
| D | -10.3 | 56 |
You will need these affinities to make comparisons with your generated structures. The chains corresponds to each nanobody in the 8CYJ structure.
Check
- Download the following files on the cluster: https://bits.csb.pitt.edu/files/NBFiles/
wget -r -np -nH --cut-dirs=2 -R "index.html*" -P NBFiles https://bits.csb.pitt.edu/files/NBFiles/
- Install BoltzGen
- Take a quick glance through the functionalities of BoltzGen as a guide for the remainder of this recitation.
- Look through the folder you downloaded and identify what each of these files are. You've run Boltz before and should be a familiar with their yaml usage. Otherwise, take a look at their documentation
- You may need to install pip with
conda install pipif you are creating a new environment for boltzgen - Install boltzgen with python 3.12
For this part of the recitation you will be running BoltzGen with their already provided scaffolds to generate 5 nanobody designs and get their binding affinities. You will check the affinity of of your designs with PRODIGY's webserver tool, a binding affinity prediction tool. (Boltz-2 has binding affinity prediction but only for protein-small ligand pairs). Find more info on PRODIGY here if you are interested.
- Run BoltzGen with BoltzGen's specified scaffolds. It might be useful to take a look at their Penguin Pox example
- Use the rbd_nb_bgscaffold.yaml for this
- Set
num_designsto 10 and set thebudgetto 5 (this will give you five designs in the end) - Make sure to specify
nanobody-anythingas the protocol - Note: if you run into any problems and your prediction crashes at any stage you can resume the run with the
boltzgenexecutecommand - You can find a description of BoltzGen's outputs here
- On an L40 this should take about 5 - 15 minutes.
- Load your designed nanobodies into pymol
- Align the RBD's and compute the rmsd of each of your designed nanobodies and the visually closest nanobody in pymol
- Upload a figure showing the two binding poses - the crystal structure and your designed nanobody for two of your designs. Mention why you selected those two.
- For calculating the RMSD of two selections without aligning them:
create an align object with the align command without transforming the object
align (sele1), (sele2), cycles=0, transform=0, object=aln_obj. Your selection object here is the nanobodies, not the RBD> You already aligned those before hand.Run rms_cur using the alignment object\
rms_cur sele1 & aln_obj, sele2 & aln_obj, matchmaker=-1
- For calculating the RMSD of two selections without aligning them:
- Note that if your selections have the same atoms in them, you don't need to the aln_obj (which specifies which atom matches to which between the selections). Setting matchmaker to -1 means rms_cur assume the order atoms are in the selections is how they should be matched up.
- Predict the binding affinity of your designs from the check with PRODIGY. Report the binding affinities (∆G) and dissociation constants (Kd) for the final two nanobod.
- Note: you will have to save your structure as a PDB for PRODIGY but BoltzGen gives them as cifs. Use this command
save file.pdb, selection - Set the temperature to 37 °C
- Note: you will have to save your structure as a PDB for PRODIGY but BoltzGen gives them as cifs. Use this command
- Compare your PRODIGY results to the nanobody it was closest to and comment on that
Upload your results to GradeScope.
Check Plus
For the check plus you will be experimenting with specifying regions on the binding target that you want your nanobody to bind to and calculating the binding affinities and Kd's of your selected nanobodies.
- In pymol, use the selection tool to create a selection of residues in the RBD that are close to one of the nanobodies in 8CYJ - note which one you selected. These residues will be given to BoltzGen as specific regions to bind to. Hint: use the selection tool with within to find residues a specific distance away from the nanobody. 4Å should be fine to use.
- Use the following command to get the indices of your selection
stored.r = []
iterate selection, stored.r.append(resi)
print(sorted(set(stored.r)))
- In
rbd_nb_bind_bgscaffolds.yamlset the binding residues to the residues you found. Refer to BoltzGen for how that should be formatted.- You can run run
boltzgen checkon your yaml to visualize and check that you selected the correct residues.
- You can run run
- Run BoltzGen with this yaml
- Report the binding affinity (∆G) and dissociation constant (Kd ) with PRODIGY. Remember to set the temperature to 37 °C.
- Create a pymol rendering of your design with the nanobody you selected. What is the RMSD?
- Comment on any binding affinity/ Kd differences with the crystal structure nanobody you selected.
Upload your results to GradeScope.